Aucun résumé des modifications |
|||
| (43 versions intermédiaires par 13 utilisateurs non affichées) | |||
| Ligne 1 : | Ligne 1 : | ||
| − | {{Noms non officiels}} |
+ | {{Noms non officiels}}Voici les différentes zones ou régions du monde de '''Monster Hunter'''. |
| + | |||
| − | {| border="0" cellpadding="0" cellspacing="0" align="center" |
||
| + | La '''liste des lieux''' recense les lieux qui constituent le monde en question, les villes et villages étant des zones d'habitations sûres dispersées un peu partout et reliées par des routes, qu'elles soit terrestres, maritimes ou aériennes, qui font office de lieu de rencontre pour les chasseurs mais aussi de point de départ de leurs expéditions. Les autres lieux sont des terrains de chasses et habitats des monstres, entièrement naturels, hormis ceux qui furent habités et laissés à l'abandon, comme le [[Château Schrade]] ou encore les Tours. Chaque région est composée de plusieurs zones et camps qui sont disposés un peu partout dans certaines de ces zones, sûrs et à l'abri des monstres. Dans chaque opus, les régions sont assez éloignées les unes des autres, à part celles du [[Monster Hunter: World|cinquième opus]], car elles sont toutes sur une seule et même île. |
||
| − | | width="30" |[[image:Important.png|30px|link=]] |
||
| + | |||
| − | |<font size="4">'''Remarques :'''</font><br /> |
||
| + | ==Villes et villages== |
||
| + | {| align="center" border="0" width="100% style=" cellpadding="3" cellspacing="10" text-align:center; background-color:#996600; color:#000000; font-size:9pt;" |
||
|- |
|- |
||
| + | |width="150px"|[[File:MHX-Kokoto Village Screenshot 003.jpg|145px|link=Village Kokoto]] |
||
| − | | colspan="2" |<div class="boilerplate metadata" id="delete" style="background-color: #fee; margin: 0 1em; padding: 0 10px; border: 1px solid #aaa;" name="Deletion notice"> |
||
| + | |width="150px"|[[File:MHonlineTown.jpg|110px|link=Ville Minegarde]] |
||
| − | *<font color="red">En cours de modification et traduction.</font> |
||
| + | |width="150px"|[[File: JumboVillage.jpg|145px|link=Village Jumbo]] |
||
| − | *'''Merci de préciser dans la section dédiée du forum si vous comptez modifier aussi cette page, pour l'organisation et éviter la perte de temps''' |
||
| + | |width="150px"|[[File:MH4U-Dondruma Screenshot 009.jpg|145px|link=Dundorma]] |
||
| − | *Page source : [http://monsterhunter.wikia.com/wiki/Area_List Liste des Zones] |
||
| + | |- |
||
| − | </div> |
||
| + | | style="background-color:#EBEBEB; text-align:center;" |'''[[Village Kokoto]]''' |
||
| + | | style="background-color:#EBEBEB; text-align:center;" |'''[[Ville Minegarde]]''' |
||
| + | | style="background-color:#EBEBEB; text-align:center;" |'''[[Village Jumbo]]''' |
||
| + | | style="background-color:#EBEBEB; text-align:center;" |'''[[Dundorma]]''' |
||
| + | |- |
||
| + | |width="150px"|[[File:MHX-Pokke Village Screenshot 001.jpg|145px|link=Village Pokke]] |
||
| + | |width="150px"|[[File:Rockrack City.jpg|145px|link=Ville Loc Lac]] |
||
| + | |width="150px"|[[File:MHX-Yukumo Village Screenshot 001.png|145px|link=Village Yukumo]] |
||
| + | |width="150px"|[[File:MogaVillage.jpg|145px|link=Village Moga]] |
||
| + | |- |
||
| + | | style="background-color:#EBEBEB; text-align:center;" |'''[[Village Pokke]]''' |
||
| + | | style="background-color:#EBEBEB; text-align:center;" |'''[[Ville Loc Lac]]''' |
||
| + | | style="background-color:#EBEBEB; text-align:center;" |'''[[Village Yukumo]]''' |
||
| + | | style="background-color:#EBEBEB; text-align:center;" |'''[[Village Moga]]''' |
||
| + | |- |
||
| + | |width="150px"|[[File:Tgs2011_title_mh3g_game05_l.jpg|145px|link=MH3U - Port Tanzia]] |
||
| + | |width="150px"|[[File:World img 19.jpg|145px|link=Val Habar]] |
||
| + | |width="150px"|[[File:MH4-Harth Village Screenshot 001.jpg|145px|link=Harth]] |
||
| + | |width="150px"|[[File:Monster-Hunter-4_2013_07-11-13_001.jpg|145px|link=Sables Cheeko]] |
||
| + | |- |
||
| + | | style="background-color:#EBEBEB; text-align:center;" |'''[[MH3U - Port Tanzia|Port Tanzia]]''' |
||
| + | | style="background-color:#EBEBEB; text-align:center;" |'''[[Val Habar]]''' |
||
| + | | style="background-color:#EBEBEB; text-align:center;" |'''[[Harth]]''' |
||
| + | | style="background-color:#EBEBEB; text-align:center;" |'''[[Sables Cheeko]]''' |
||
| + | |- |
||
| + | |width="150px"|[[File:Shinato Village 1.png|145px|link=Cathar]] |
||
| + | |width="150px"|[[File:MHX-Beruna Screenshot 001.jpg|145px|link=Bherna]] |
||
| + | |width="150px"|[[File:MHXX-Wycademy Ship Recon Artwork 001.jpg|145px|link=Aérolabo]] |
||
| + | |width="150px"|[[File:MHW-Astera Screenshot 001.jpg|145px|link=Astera]] |
||
| + | |- |
||
| + | | style="background-color:#EBEBEB; text-align:center;" |'''[[Cathar]]''' |
||
| + | | style="background-color:#EBEBEB; text-align:center;" |'''[[Bherna]]''' |
||
| + | | style="background-color:#EBEBEB; text-align:center;" |'''[[Aérolabo]]''' |
||
| + | | style="background-color:#EBEBEB; text-align:center;" |'''[[Astera]]''' |
||
| + | |||
| + | |- |
||
| + | |width="150px"|[[File:MHW-Investigation Base Screenshot 001.jpg|145px|link=Base d'investigation]] |
||
| + | |width="150px"|[[File:MHWI-Seliana Screenshot 8.png|145px|link=Seliana]] |
||
| + | |- |
||
| + | | style="background-color:#EBEBEB; text-align:center;" |'''[[Base d'investigation]]''' |
||
| + | | style="background-color:#EBEBEB; text-align:center;" |'''[[Seliana]]''' |
||
|} |
|} |
||
| + | {| align="center" border="0" width="100% style=" cellpadding="3" cellspacing="10" text-align:center; background-color:#996600; color:#000000; font-size:9pt;" |
||
| + | |- |
||
| + | |width="150px"|[[File:Mezeporuta.jpg|145px|link=Place Mezeporta]] |
||
| + | |width="150px"|[[File:Mi De La 2.jpg|145px|link=Village Milard]] |
||
| + | |width="150px"|[[File:MHOL-Hunter's Manor Screenshot 001.jpg|145px|link=Manoir du Chasseur]] |
||
| + | |width="150px"|[[File:MHOL-Mezeporta Screenshot 002.jpg|145px|link=Mezeporta]] |
||
| + | |- |
||
| + | | style="background-color:#EBEBEB; text-align:center;" |'''[[Place Mezeporta]]''' |
||
| + | | style="background-color:#EBEBEB; text-align:center;" |'''[[Village Milard]]''' |
||
| + | | style="background-color:#EBEBEB; text-align:center;" |'''[[Manoir du Chasseur]]''' |
||
| + | | style="background-color:#EBEBEB; text-align:center;" |'''[[Mezeporta]]''' |
||
| + | |} |
||
| + | ==1<sup>ère</sup> génération== |
||
| − | <font size="size">Voici les différentes zones du [[World of Monster Hunter|Monde de Monster Hunter]].</font> |
||
| + | * [[Monster Hunter]] |
||
| + | * [[Monster Hunter G]] |
||
| + | * [[Monster Hunter Freedom]] |
||
| + | {| align="center" border="0" width="100% style=" cellpadding="3" cellspacing="10" text-align:center; background-color:#996600; color:#000000; font-size:9pt;" |
||
| − | ==Zones de Première Génération== |
||
| − | [[Monster Hunter]], [[Monster Hunter G]], [[Monster Hunter Freedom]] |
||
| − | {|cellspacing="0" cellpadding="4" border="0" |
||
| − | |bgcolor="#3A5766" align="center"|'''<font size="3">[[Forêt et Colline]]</font>'''<br />[[File:QuestBG23.png|150px|link=Forest and Hills]] |
||
| − | |align="center"| |
||
| − | |bgcolor="#3A5766" align="center"|'''<font size="3">[[Vieille Jungle]]</font>'''<br />[[File:QuestBG06.png|150px|link=Old Jungle]] |
||
| − | |align="center"| |
||
| − | |bgcolor="#3A5766" align="center"|'''<font size="3">[[Vieux Désert]]</font>'''<br />[[File:QuestBG05.png|150px|link=Old Desert]] |
||
| − | |align="center"| |
||
| − | |bgcolor="#3A5766" align="center"|'''<font size="3">[[Vieux Marais]]</font>'''<br />[[File:QuestBG02.png|150px|link=Old Swamp]] |
||
|- |
|- |
||
| + | |width="150px"|[[File:QuestBG23.png|145px|link=Forêt et Collines]] |
||
| − | |align="center"| |
||
| + | |width="150px"|[[File:QuestBG06.png|145px|link=Vieille Jungle]] |
||
| − | |align="center"| |
||
| + | |width="150px"|[[File:QuestBG05.png|145px|link=Vieux Désert]] |
||
| − | |align="center"| |
||
| + | |width="150px"|[[File:QuestBG02.png|145px|link=Vieux Marais]] |
||
| − | |align="center"| |
||
| − | |align="center"| |
||
| − | |align="center"| |
||
| − | |align="center"| |
||
|- |
|- |
||
| + | | style="background-color:#EBEBEB; text-align:center;" |'''[[Forêt et Collines]]''' |
||
| − | |bgcolor="#3A5766" align="center"|'''<font size="3">[[Vieux Volcan]]</font>'''<br />[[File:QuestBG04.png|150px|link=Old Volcano]] |
||
| + | |||
| − | |align="center"| |
||
| + | <div style="font-size:12pt;"> </div> |
||
| − | |bgcolor="#3A5766" align="center"|'''<font size="3">[[Forteresse]]</font>'''<br />[[File:QuestBG20.png|150px|link=Fortress]] |
||
| + | | style="background-color:#EBEBEB; text-align:center;" |'''[[Vieille Jungle]]''' |
||
| − | |align="center"| |
||
| + | |||
| − | |bgcolor="#3A5766" align="center"|'''<font size="3">[[Château Schrade ]]</font>'''<br />[[File:QuestBG14.png|150px|link=Castle Schrade]] |
||
| + | <div style="font-size:12pt;"> </div> |
||
| − | |align="center"| |
||
| + | | style="background-color:#EBEBEB; text-align:center;" |'''[[Vieux Désert]]''' |
||
| − | |bgcolor="#3A5766" align="center"|'''<font size="3">[[Terrain de Bataille]]</font>'''<br />[[File:QuestBG22.png|150px|link=Battleground]] |
||
| + | |||
| + | <div style="font-size:12pt;"> </div> |
||
| + | | style="background-color:#EBEBEB; text-align:center;" |'''[[Vieux Marais]]''' |
||
| + | |||
| + | <div style="font-size:12pt;"> </div> |
||
| + | |- |
||
| + | |width="150px"|[[File:QuestBG04.png|145px|link=Vieux Volcan]] |
||
| + | |width="150px"|[[File:QuestBG20.png|145px|link=Forteresse]] |
||
| + | |width="150px"|[[File:QuestBG14.png|145px|link=Château Schrade]] |
||
| + | |width="150px"|[[File:QuestBG22.png|145px|link=Terrain de Bataille]] |
||
| + | |- |
||
| + | | style="background-color:#EBEBEB; text-align:center;" |'''[[Vieux Volcan]]''' |
||
| + | |||
| + | <div style="font-size:12pt;"> </div> |
||
| + | | style="background-color:#EBEBEB; text-align:center;" |'''[[Forteresse]]''' |
||
| + | |||
| + | <div style="font-size:12pt;"> </div> |
||
| + | | style="background-color:#EBEBEB; text-align:center;" |'''[[Château Schrade]]''' |
||
| + | |||
| + | <div style="font-size:12pt;"> </div> |
||
| + | | style="background-color:#EBEBEB; text-align:center;" |'''[[Terrain de Bataille]]''' |
||
| + | |||
| + | <div style="font-size:12pt;"> </div> |
||
|- |
|- |
||
| + | |width="150px"|[[File:QuestBG18.png|145px|link=Arène]] |
||
| + | |width="150px"|[[File:QuestBG12.png|145px|link=Grande Arène]] |
||
| |
| |
||
| − | |align="center"| |
||
| |
| |
||
| + | |- |
||
| − | |align="center"| |
||
| + | | style="background-color:#EBEBEB; text-align:center;" |'''[[Arène]]''' |
||
| + | |||
| + | <div style="font-size:12pt;"> </div> |
||
| + | | style="background-color:#EBEBEB; text-align:center;" |'''[[Grande Arène]]''' |
||
| + | |||
| + | <div style="font-size:12pt;"> </div> |
||
| |
| |
||
| − | |align="center"| |
||
| |
| |
||
| + | |} |
||
| + | |||
| + | == 2<sup>ème</sup> génération == |
||
| + | * [[Monster Hunter 2]] |
||
| + | * [[Monster Hunter Freedom 2]] |
||
| + | * [[Monster Hunter Freedom Unite]] |
||
| + | |||
| + | {| align="center" border="0" width="100% style=" cellpadding="3" cellspacing="10" text-align:center; background-color:#996600; color:#000000; font-size:9pt;" |
||
|- |
|- |
||
| + | |width="150px"|[[File:QuestBG15.png|145px|link=Montagne enneigée]] |
||
| − | |bgcolor="#3A5766" align="center"|'''<font size="3">[[Arena|Arène]]</font>'''<br />[[File:QuestBG18.png|150px|link=Arena]] |
||
| + | |width="150px"|[[File:QuestBG10.png|145px|link=Jungle]] |
||
| − | |align="center"| |
||
| + | |width="150px"|[[File:QuestBG17.png|145px|link=Désert]] |
||
| − | |bgcolor="#3A5766" align="center"|'''<font size="3">[[Great Arena|Grande Arène]]</font>'''<br />[[File:QuestBG12.png|150px|link=Great Arena]] |
||
| + | |width="150px"|[[File:QuestBG16.png|145px|link=Marais]] |
||
| − | |align="center"| |
||
| + | |- |
||
| − | |align="center"| |
||
| + | | style="background-color:#EBEBEB; text-align:center;" |'''[[Montagne enneigée]]''' |
||
| − | |align="center"| |
||
| + | |||
| − | | |
||
| + | <div style="font-size:12pt;"> </div> |
||
| + | | style="background-color:#EBEBEB; text-align:center;" |'''[[Jungle]]''' |
||
| + | |||
| + | <div style="font-size:12pt;"> </div> |
||
| + | | style="background-color:#EBEBEB; text-align:center;" |'''[[Désert]]''' |
||
| + | |||
| + | <div style="font-size:12pt;"> </div> |
||
| + | | style="background-color:#EBEBEB; text-align:center;" |'''[[Marais]]''' |
||
| + | |||
| + | <div style="font-size:12pt;"> </div> |
||
| + | |- |
||
| + | |width="150px"|[[File:QuestBG21.png|145px|link=Volcan]] |
||
| + | |width="150px"|[[File:QuestBG01.png|145px|link=Grande Forêt]] |
||
| + | |width="150px"|[[File:QuestBG19.png|145px|link=Ville]] |
||
| + | |width="150px"|[[File:QuestBG03.png|145px|link=Pics Enneigés]] |
||
| + | |- |
||
| + | | style="background-color:#EBEBEB; text-align:center;" |'''[[Volcan (2nd)|Volcan]]''' |
||
| + | |||
| + | <div style="font-size:12pt;"> </div> |
||
| + | | style="background-color:#EBEBEB; text-align:center;" |'''[[Grande Forêt]]''' |
||
| + | |||
| + | <div style="font-size:12pt;"> </div> |
||
| + | | style="background-color:#EBEBEB; text-align:center;" |'''[[Ville]]''' |
||
| + | |||
| + | <div style="font-size:12pt;"> </div> |
||
| + | | style="background-color:#EBEBEB; text-align:center;" |'''[[Pics Enneigés]]''' |
||
| + | |||
| + | <div style="font-size:12pt;"> </div> |
||
| + | |- |
||
| + | |width="150px"|[[File:QuestBG11.png|145px|link=Tour]] |
||
| + | |width="150px"|[[File:QuestBG08.png|145px|link=Tour 2]] |
||
| + | |width="150px"|[[File:QuestBG07.png|145px|link=Tour 3]] |
||
| + | |width="150px"|[[File:QuestBG09.png|145px|link=Arène des douves]] |
||
| + | |- |
||
| + | | style="background-color:#EBEBEB; text-align:center;" |'''[[Tour]]''' |
||
| + | |||
| + | <div style="font-size:12pt;"> </div> |
||
| + | | style="background-color:#EBEBEB; text-align:center;" |'''[[Tour 2]]''' |
||
| + | |||
| + | <div style="font-size:12pt;"> </div> |
||
| + | | style="background-color:#EBEBEB; text-align:center;" |'''[[Tour 3]]''' |
||
| + | |||
| + | <div style="font-size:12pt;"> </div> |
||
| + | | style="background-color:#EBEBEB; text-align:center;" |'''[[Arène des douves]]''' |
||
| + | |||
| + | <div style="font-size:12pt;"> </div> |
||
|} |
|} |
||
| − | == |
+ | ==3<sup>ème</sup> Génération== |
| + | * [[Monster Hunter Tri]] |
||
| − | [[Monster Hunter 2]], [[Monster Hunter Freedom 2]], [[Monster Hunter Portable 2nd G]], [[Monster Hunter Freedom Unite]] |
||
| + | * [[Monster Hunter Portable 3rd]] |
||
| − | {|cellspacing="0" cellpadding="4" border="0" |
||
| + | * [[Monster Hunter 3 Ultimate]] |
||
| − | |bgcolor="#3A5766" align="center"|'''<font size="3">[[Montagne Enneigée]]</font>'''<br />[[File:QuestBG15.png|150px|link=Snowy Mountains]] |
||
| + | |||
| − | |align="center"| |
||
| + | {| align="center" border="0" width="100% style=" cellpadding="3" cellspacing="10" text-align:center; background-color:#996600; color:#000000; font-size:9pt;" |
||
| − | |bgcolor="#3A5766" align="center"|'''<font size="3">[[Jungle]]</font>'''<br />[[File:QuestBG10.png|150px|link=Jungle]] |
||
| − | |align="center"| |
||
| − | |bgcolor="#3A5766" align="center"|'''<font size="3">[[Désert]]</font>'''<br />[[File:QuestBG17.png|150px|link=Desert]] |
||
| − | |align="center"| |
||
| − | |bgcolor="#3A5766" align="center"|'''<font size="3">[[Marais]]</font>'''<br />[[File:QuestBG16.png|150px|link=Swamp]] |
||
|- |
|- |
||
| + | |width="150px"|[[File:Mh3forest.jpg|145px|link=Île déserte]] |
||
| − | |align="center"| |
||
| + | |width="150px"|[[File:Mh33desert.jpg|145px|link=Plaines de sable]] |
||
| − | |align="center"| |
||
| + | |width="150px"|[[File:Mh3swamp.jpg|145px|link=Forêt inondée]] |
||
| − | |align="center"| |
||
| + | |width="150px"|[[File:Mh3snowmountains.jpg|145px|link=Toundra]] |
||
| − | |align="center"| |
||
| − | |align="center"| |
||
| − | |align="center"| |
||
| − | |align="center"| |
||
|- |
|- |
||
| + | | style="background-color:#EBEBEB; text-align:center;" |'''[[Île déserte]]''' |
||
| − | |bgcolor="#3A5766" align="center"|'''<font size="3">[[Volcan]]</font>'''<br />[[File:QuestBG21.png|150px|link=Volcano]] |
||
| + | |||
| − | |align="center"| |
||
| + | <div style="font-size:12pt;"> </div> |
||
| − | |bgcolor="#3A5766" align="center"|'''<font size="3">[[Grande Forêt]]</font>'''<br />[[File:QuestBG01.png|150px|link=Great Forest]] |
||
| + | | style="background-color:#EBEBEB; text-align:center;" |'''[[Plaines de sable]]''' |
||
| − | |align="center"| |
||
| + | |||
| − | |bgcolor="#3A5766" align="center"|'''<font size="3">[[Ville]]</font>'''<br />[[File:QuestBG19.png|150px|link=Town]] |
||
| + | <div style="font-size:12pt;"> </div> |
||
| − | |align="center"| |
||
| + | | style="background-color:#EBEBEB; text-align:center;" |'''[[Forêt inondée]]''' |
||
| − | |bgcolor="#3A5766" align="center"|'''<font size="2">[[Pics Enneigés]]</font>'''<br />[[File:QuestBG03.png|150px|link=Snowy Mountains Peak]] |
||
| + | |||
| + | <div style="font-size:12pt;"> </div> |
||
| + | | style="background-color:#EBEBEB; text-align:center;" |'''[[Toundra]]''' |
||
| + | |||
| + | <div style="font-size:12pt;"> </div> |
||
|- |
|- |
||
| + | |width="150px"|[[File:Mh3volcano.jpg|145px|link=Volcan]] |
||
| − | | |
||
| + | |width="150px"|[[File:MountainStream.jpg|145px|link=Pics brumeux]] |
||
| − | |align="center"| |
||
| + | |width="150px"|[[File:UnderwaterRuins.png|145px|link=Ruine sous-marine]] |
||
| − | | |
||
| + | |width="150px"|[[File:GreatDesert.jpg|145px|link=Grand Désert]] |
||
| − | |align="center"| |
||
| − | | |
||
| − | |align="center"| |
||
| − | | |
||
|- |
|- |
||
| + | | style="background-color:#EBEBEB; text-align:center;" |'''[[Volcan]]''' |
||
| − | |bgcolor="#3A5766" align="center"|'''<font size="3">[[Tower|Tour]]</font>'''<br />[[File:QuestBG11.png|150px|link=Tower]] |
||
| + | |||
| − | |align="center"| |
||
| + | <div style="font-size:12pt;"> </div> |
||
| − | |bgcolor="#3A5766" align="center"|'''<font size="3">[[Tour 2]]</font>'''<br />[[File:QuestBG08.png|150px|link=Tower 2]] |
||
| + | | style="background-color:#EBEBEB; text-align:center;" |'''[[Pics brumeux]]''' |
||
| − | |align="center"| |
||
| + | |||
| − | |bgcolor="#3A5766" align="center"|'''<font size="3">[[Tower 3|Tour 3]]</font>'''<br />[[File:QuestBG07.png|150px|link=Tower 3]] |
||
| + | <div style="font-size:12pt;"> </div> |
||
| − | |align="center"| |
||
| + | | style="background-color:#EBEBEB; text-align:center;" |'''[[Ruine sous-marine]]''' |
||
| − | |bgcolor="#3A5766" align="center"|'''<font size="3">[[Moat Arena|Arène des douves]]</font>'''<br />[[File:QuestBG09.png|150px|link=Moat Arena]] |
||
| + | |||
| + | <div style="font-size:12pt;"> </div> |
||
| + | | style="background-color:#EBEBEB; text-align:center;" |'''[[Grand Désert]]''' |
||
| + | |||
| + | <div style="font-size:12pt;"> </div> |
||
| + | |- |
||
| + | |width="150px"|[[File:GodTerritory.png|145px|link=Terre sacrée]] |
||
| + | |width="150px"|[[File:LavaCanyon.png|145px|link=Canyon de Lave]] |
||
| + | |width="150px"|[[File:Polar Zone.jpg|145px|link=Zone polaire]] |
||
| + | |width="150px"|[[File:Mountain Summit.jpg|145px|link=Montagne sacrée]] |
||
| + | |- |
||
| + | | style="background-color:#EBEBEB; text-align:center;" |'''[[Terre sacrée]]''' |
||
| + | |||
| + | <div style="font-size:12pt;"> </div> |
||
| + | | style="background-color:#EBEBEB; text-align:center;" |'''[[Canyon de Lave]]''' |
||
| + | |||
| + | <div style="font-size:12pt;"> </div> |
||
| + | | style="background-color:#EBEBEB; text-align:center;" |'''[[Zone polaire]]''' |
||
| + | |||
| + | <div style="font-size:12pt;"> </div> |
||
| + | | style="background-color:#EBEBEB; text-align:center;" |'''[[Montagne sacrée]]''' |
||
| + | |||
| + | <div style="font-size:12pt;"> </div> |
||
| + | |- |
||
| + | |width="150px"|[[File:MH3G-Disastrous Sea 01.png|145px|link=Mer Impure]] |
||
| + | |width="150px"|[[File:Mh3landarena.jpg|145px|link=Arène Terrestre]] |
||
| + | |width="150px"|[[File:Mh3waterarena.jpg|145px|link=Arène Aquatique]] |
||
| + | |width="150px"|[[File:New are 2.JPG|145px|link=Petite Arène]] |
||
| + | |- |
||
| + | | style="background-color:#EBEBEB; text-align:center;" |'''[[Mer Impure]]''' |
||
| + | |||
| + | <div style="font-size:12pt;"> </div> |
||
| + | | style="background-color:#EBEBEB; text-align:center;" |'''[[Arène Terrestre]]''' |
||
| + | |||
| + | <div style="font-size:12pt;"> </div> |
||
| + | | style="background-color:#EBEBEB; text-align:center;" |'''[[Arène Aquatique]]''' |
||
| + | |||
| + | <div style="font-size:12pt;"> </div> |
||
| + | | style="background-color:#EBEBEB; text-align:center;" |'''[[Petite Arène]]''' |
||
| + | |||
| + | <div style="font-size:12pt;"> </div> |
||
|} |
|} |
||
| − | == |
+ | ==4<sup>ème</sup> Génération== |
| + | * [[Monster Hunter 4 Ultimate|Monster Hunter 4]] |
||
| + | * [[Monster Hunter 4 Ultimate]] |
||
| + | * [[Monster Hunter Generations]] |
||
| + | * [[Monster Hunter Generations Ultimate]] |
||
| + | '''Notes:''' Dans Monster Hunter Generations, les zones '''[[Forêt et Collines]]''', '''[[Montagne enneigée]]''' et '''[[Montagne sacrée]]''' sont renommées en '''Collines verdoyantes''', '''Crête arctique''' et '''Cime des esprits'''. |
||
| − | [[Monster Hunter Tri]], [[Monster Hunter Portable 3rd]], [[Monster Hunter 3 Ultimate]] |
||
| + | |||
| − | {|cellspacing="0" cellpadding="4" border="0" |
||
| + | {| align="center" border="0" width="100% style=" cellpadding="3" cellspacing="10" text-align:center; background-color:#996600; color:#000000; font-size:9pt;" |
||
| − | |bgcolor="#3A5766" align="center"|'''<font size="3">[[Île Déserte]]</font>'''<br />[[File:Mh3forest.jpg|150px|link=Île Déserte]] |
||
| − | |align="center"| |
||
| − | |bgcolor="#3A5766" align="center"|'''<font size="3">[[Plaines de sable]]</font>'''<br />[[File:Mh33desert.jpg|150px|link=Plaines de Sable]] |
||
| − | |align="center"| |
||
| − | |bgcolor="#3A5766" align="center"|'''<font size="3">[[Forêt inondée]]</font>'''<br />[[File:Mh3swamp.jpg|150px|link=Forêt Inondée]] |
||
| − | |align="center"| |
||
| − | |bgcolor="#3A5766" align="center"|'''<font size="3">[[Toundra]]</font>'''<br />[[File:Mh3snowmountains.jpg|150px|link=Toundra]] |
||
|- |
|- |
||
| + | |width="150px"|[[File:MH4U-Ancestral Steppe Screenshot 001.jpg|145px|link=Steppe ancestrale]] |
||
| − | |align="center"| |
||
| + | |width="150px"|[[File:Primeval Forest.jpg|145px|link=Forêt primitive]] |
||
| − | |align="center"| |
||
| + | |width="150px"|[[File:Underground Cave Base Camp.jpg|145px|link=Vallon immergé]] |
||
| − | |align="center"| |
||
| + | |width="150px"|[[File:Frostfield.png|145px|link=Mer de glace]] |
||
| − | |align="center"| |
||
| − | |align="center"| |
||
| − | |align="center"| |
||
| − | |align="center"| |
||
|- |
|- |
||
| + | | style="background-color:#EBEBEB; text-align:center;" |'''[[Steppe ancestrale]]''' |
||
| − | |bgcolor="#3A5766" align="center"|'''<font size="3">[[Volcan]]</font>'''<br />[[File:Mh3volcano.jpg|150px|link=Volcan]] |
||
| + | |||
| − | |align="center"| |
||
| + | <div style="font-size:12pt;">遺跡平原</div> |
||
| − | |bgcolor="#3A5766" align="center"|'''<font size="3">[[Pics Brumeux]]</font>'''<br />[[File:MountainStream.jpg|150px|link=Pics Brumeux]] |
||
| + | | style="background-color:#EBEBEB; text-align:center;" |'''[[Forêt primitive]]''' |
||
| − | |align="center"| |
||
| + | |||
| − | |bgcolor="#3A5766" align="center"|'''<font size="3">[[Ruine sous-marine|Ruines Sous-marines]]</font>'''<br />[[File:UnderwaterRuins.png|150px|link=Ruine sous-marine]] |
||
| + | <div style="font-size:12pt;">原生林</div> |
||
| − | |align="center"| |
||
| + | | style="background-color:#EBEBEB; text-align:center;" |'''[[Vallon immergé]]''' |
||
| − | |bgcolor="#3A5766" align="center"|'''<font size="3">[[Grand Désert]]</font>'''<br />[[File:GreatDesert.jpg|150px|link=Grand Désert]] |
||
| + | |||
| + | <div style="font-size:12pt;">地底洞窟</div> |
||
| + | | style="background-color:#EBEBEB; text-align:center;" |'''[[Mer de glace]]''' |
||
| + | |||
| + | <div style="font-size:12pt;">氷海</div> |
||
|- |
|- |
||
| + | |[[File:World img 32.jpg|145px|link=Vallon volcanique]] |
||
| − | |align="center"| |
||
| + | |[[File:Heavenly Mountain 4.png|145px|link=Mont céleste]] |
||
| − | |align="center"| |
||
| + | |[[File:MH4-Tower Top Screenshot 001.jpg|145px|link=Pinacle]] |
||
| − | |align="center"| |
||
| + | |[[File:World img 24.jpg|145px|link=Bois éternel]] |
||
| − | |align="center"| |
||
| − | |align="center"| |
||
| − | |align="center"| |
||
| − | |align="center"| |
||
|- |
|- |
||
| + | | style="background-color:#EBEBEB; text-align:center;" |'''[[Vallon volcanique]]''' |
||
| − | |bgcolor="#3A5766" align="center"|'''<font size="3">[[Terre sacrée]]</font>'''<br />[[File:GodTerritory.png|150px|link=Terre sacrée]] |
||
| + | |||
| − | |align="center"| |
||
| + | <div style="font-size:12pt;">地底火山</div> |
||
| − | |bgcolor="#3A5766" align="center"|'''<font size="3">[[Canyon de Lave]]</font>'''<br />[[File:LavaCanyon.png|150px|link=Canyon de Lave]] |
||
| + | | style="background-color:#EBEBEB; text-align:center;" |'''[[Mont céleste]]''' |
||
| − | |align="center"| |
||
| + | |||
| − | |bgcolor="#3A5766" align="center"|'''<font size="3">[[Glacier - 3rd|Zone Polaire]]</font>'''<br />[[File:Polar Zone.jpg|150px|link=Glacier - 3rd]] |
||
| + | <div style="font-size:12pt;">天空山</div> |
||
| − | |align="center"| |
||
| + | | style="background-color:#EBEBEB; text-align:center;" |'''[[Pinacle]]''' |
||
| − | |bgcolor="#3A5766" align="center"|'''<font size="3">[[Montagne Sacrée]]</font>'''<br />[[File:Mountain Summit.jpg|150px|link=Montagne Sacrée]] |
||
| + | |||
| + | <div style="font-size:12pt;">塔の頂</div> |
||
| + | | style="background-color:#EBEBEB; text-align:center;" |'''[[Bois éternel]]''' |
||
| + | |||
| + | <div style="font-size:12pt;">未知の樹海</div> |
||
|- |
|- |
||
| + | |[[File:FGMH43.png|145px|link=Sanctuaire]] |
||
| − | |align="center"| |
||
| + | |[[File:MH4-Lava Island Screenshot 002.png|145px|link=Île d'Ingle]] |
||
| − | |align="center"| |
||
| + | |[[File:MH4-Thousand Blade Mountain Screenshot 001.jpg|145px|link=Pointe de lance]] |
||
| − | |align="center"| |
||
| + | |width="150px"|[[File:MH4U-Old Desert Screenshot 001.jpg|145px|link=Dunes]] |
||
| − | |align="center"| |
||
| − | |align="center"| |
||
| − | |align="center"| |
||
| − | |align="center"| |
||
|- |
|- |
||
| + | | style="background-color:#EBEBEB; text-align:center;" |'''[[Sanctuaire]]''' |
||
| − | |bgcolor="#3A5766" align="center"|'''<font size="3">[[Mer Impure]]</font>'''<br />[[File:MH3G-Disastrous Sea 01.png|150px|link=Mer Impure]] |
||
| + | |||
| − | |align="center"| |
||
| + | <div style="font-size:12pt;">禁足地</div> |
||
| − | |bgcolor="#3A5766" align="center"|'''<font size="3">[[Arène Terrestre]]</font>'''<br />[[File:Mh3landarena.jpg|150px|link=Arène terrestre]] |
||
| + | | style="background-color:#EBEBEB; text-align:center;" |'''[[Île d'Ingle]]''' |
||
| − | |align="center"| |
||
| + | |||
| − | |bgcolor="#3A5766" align="center"|'''<font size="3">[[Arène Aquatique]]</font>'''<br />[[File:Mh3waterarena.jpg|150px|link=Arène Aquatique]] |
||
| + | <div style="font-size:12pt;">溶岩島</div> |
||
| − | |align="center"| |
||
| + | | style="background-color:#EBEBEB; text-align:center;" |'''[[Pointe de lance]]''' |
||
| − | |bgcolor="#3A5766" align="center"|'''<font size="3">[[Petite Arène]]</font>'''<br />[[File:New are 2.JPG|150px|link=Petite Arène]] |
||
| + | |||
| + | <div style="font-size:12pt;">千剣山</div> |
||
| + | | style="background-color:#EBEBEB; text-align:center;" |'''[[Dunes]]''' |
||
| + | |||
| + | <div style="font-size:12pt;">旧砂漠</div> |
||
| + | |- |
||
| + | |width="150px"|[[File:MH4-Arena Screenshot 001.jpg|145px|link=Arène MH4U]] |
||
| + | |width="150px"|[[File:MH4-3D Arena Screenshot 001.jpg|145px|link=Colisée]] |
||
| + | |width="150px"|[[File:MH4U-Polar Zone Screenshot 001.jpg|145px|link=Zone polaire]] |
||
| + | |width="150px"|[[File:MH4U-Great Ocean Screenshot 001.png|145px|link=Grand Océan]] |
||
| + | |- |
||
| + | | style="background-color:#EBEBEB; text-align:center;" |'''[[Arène MH4U|Arène]]''' |
||
| + | |||
| + | <div style="font-size:12pt;">闘技場</div> |
||
| + | | style="background-color:#EBEBEB; text-align:center;" |'''[[Colisée]]''' |
||
| + | |||
| + | <div style="font-size:12pt;">立体闘技場</div> |
||
| + | | style="background-color:#EBEBEB; text-align:center;" |'''[[Zone polaire]]''' |
||
| + | |||
| + | <div style="font-size:12pt;">極圏</div> |
||
| + | | style="background-color:#EBEBEB; text-align:center;" |'''[[Grand Océan]]''' |
||
| + | |||
| + | <div style="font-size:12pt;">極圏</div> |
||
| + | |- |
||
| + | |width="150px"|[[File:MHX-Dragon_Graveyard_Screenshot_002.jpg|145px|link=Cimetière des wyvernes]] |
||
| + | |width="150px"|[[File:MHX-Ancient Forest Screenshot 001.jpg|145px|link=Frontière jurassique]] |
||
| + | |width="150px"|[[File:MHXX-Ruined Ridge Screenshot 006.jpg|145px|link=Cime oubliée]] |
||
| + | |width="150px"|[[File:MHXX-Old Fortress Ruins Screenshot 001.png|145px|link=Bastion perdu]] |
||
| + | |- |
||
| + | | style="background-color:#EBEBEB; text-align:center;" |'''[[Cimetière des wyvernes]]''' |
||
| + | |||
| + | <div style="font-size:12pt;">龍ノ墓場</div> |
||
| + | | style="background-color:#EBEBEB; text-align:center;" |'''[[Frontière jurassique]] ''' |
||
| + | |||
| + | <div style="font-size:12pt;">古代森</div> |
||
| + | | style="background-color:#EBEBEB; text-align:center;" |'''[[Cime oubliée]]''' |
||
| + | |||
| + | <div style="font-size:12pt;">遺群嶺</div> |
||
| + | | style="background-color:#EBEBEB; text-align:center;" |'''[[Bastion perdu]] ''' |
||
| + | |||
| + | <div style="font-size:12pt;">旧砦跡</div> |
||
|} |
|} |
||
| + | == 5<sup>ème</sup> génération == |
||
| − | ==Zones de Quatrième Génération== |
||
| − | + | * [[Monster Hunter: World]] |
|
| + | * [[Monster Hunter World: Iceborne]] |
||
| − | {|cellspacing="0" cellpadding="4" border="0" |
||
| + | |||
| − | |bgcolor="#3A5766" align="center"|'''<font size="3">[[Ancestral Steppe|Steppe Ancestrale]]</font>'''<br />[[File:World img 04.jpg|150px|link=Ancestral Steppe]] |
||
| + | {| align="center" border="0" width="100% style=" cellpadding="3" cellspacing="10" text-align:center; background-color:#996600; color:#000000; font-size:9pt;" |
||
| − | |align="center"| |
||
| − | |bgcolor="#3A5766" align="center"|'''<font size="3">[[Sunken Hollow|Cavité Submergée ]]</font>'''<br />[[File:Underground Cave Base Camp.jpg|150px|link=Sunken Hollow]] |
||
| − | |align="center"| |
||
| − | |bgcolor="#3A5766" align="center"|'''<font size="3">[[Primeval Forest|Forêt Primaire]]</font>'''<br />[[File:Primeval Forest.jpg|150px|link=Primeval Forest]] |
||
| − | |align="center"| |
||
| − | |bgcolor="#3A5766" align="center"|'''<font size="2">[[Unknown Great Forest|Grande Forêt Inconnue]]</font>'''<br />[[File:World_img_24.jpg|150px|link=Unknown Great Forest]] |
||
|- |
|- |
||
| + | |width="150px"|[[File:MHW-Wildspire Waste Screenshot 001.jpg|145px|link=Désert des termites]] |
||
| − | |align="center"| |
||
| + | |width="150px"|[[File:MHW-Ancient Forest Artwork 001.jpg|145px|link=Forêt ancienne]] |
||
| − | |align="center"| |
||
| + | |width="150px"|[[File:MHW-Coral Highlands Screenshot 001.png|145px|link=Plateau de corail]] |
||
| − | |align="center"| |
||
| + | |width="150px"|[[File:MHW-Rotten Vale Screenshot 003.png|145px|link=Val putride]] |
||
| − | |align="center"| |
||
| − | |align="center"| |
||
| − | |align="center"| |
||
|- |
|- |
||
| + | | style="background-color:#EBEBEB; text-align:center;" |'''[[Désert des termites]]''' |
||
| − | |bgcolor="#3A5766" align="center"|'''<font size="3">[[Frozen Seaway|Mer Gelée]]</font>'''<br />[[File:Frostfield.png|150px|link=Frozen Seaway]] |
||
| + | |||
| − | |align="center"| |
||
| + | <div style="font-size:12pt;">大蟻塚の荒地</div> |
||
| − | |bgcolor="#3A5766" align="center"|'''<font size="2">[[Underground Volcano|Volcan souterrain]]</font>'''<br />[[File:World_img_32.jpg|150px|link=Underground Volcano]] |
||
| + | | style="background-color:#EBEBEB; text-align:center;" |'''[[Forêt ancienne]]''' |
||
| − | |align="center"| |
||
| + | |||
| − | |bgcolor="#3A5766" align="center"|'''<font size="3">[[Heavenly Mountain|Montagne Divine]]</font>'''<br />[[File:Heavenly_Mountain_4.png|150px|link=Heavenly Mountain]] |
||
| + | <div style="font-size:12pt;">古代樹の森</div> |
||
| − | |align="center"| |
||
| + | | style="background-color:#EBEBEB; text-align:center;" |'''[[Plateau de corail]]''' |
||
| − | |bgcolor="#3A5766" align="center"|'''<font size="3">[[Old Desert (MH4U)|Vieux Désert (MH4U)]]</font>'''<br />[[File:MH4U-Old Desert Screenshot 001.jpg|150px|link=Old Desert (MH4U)]] |
||
| + | |||
| + | <div style="font-size:12pt;">陸珊瑚の台地</div> |
||
| + | | style="background-color:#EBEBEB; text-align:center;" |'''[[Val putride]]''' |
||
| + | |||
| + | <div style="font-size:12pt;">瘴気の谷</div> |
||
|- |
|- |
||
| + | |width="150px"|[[File:MHW-Terre des anciens.jpg|145px|link=Terre des anciens]] |
||
| − | |align="center"| |
||
| + | |width="150px"|[[File:MHW-Confluence of Fates Screenshot 001.png|145px|link=Croisée des destins]] |
||
| − | |align="center"| |
||
| + | |width="150px"|[[File:MHW-Great Ravine Screenshot 001.png|145px|link=Grand ravin]] |
||
| − | |align="center"| |
||
| + | |width="150px"|[[File:MHW-Everstream Screenshot 001.png|145px|link=Rivière éternelle]] |
||
| − | |align="center"| |
||
| − | |align="center"| |
||
| − | |align="center"| |
||
|- |
|- |
||
| + | | style="background-color:#EBEBEB; text-align:center;" |'''[[Terre des anciens]]''' |
||
| − | |bgcolor="#3A5766" align="center"|'''<font size="3">[[Forbidden Grounds|Terres Oubliées]]</font>'''<br />[[File:Forbidden Grounds MH4.png|150px|link=Forbidden Grounds]] |
||
| + | |||
| − | |align="center"| |
||
| + | <div style="font-size:12pt;">大蟻塚の荒地</div> |
||
| − | |bgcolor="#3A5766" align="center"|'''<font size="2">[[Thousand Blade Mountain|Montagne des cents lames]]</font>'''<br />[[File:Thousand_Blade_Mountain.jpg|150px|link=Thousand Blade Mountain]] |
||
| + | | style="background-color:#EBEBEB; text-align:center;" |'''[[Croisée des destins]]''' |
||
| − | |align="center"| |
||
| + | |||
| − | |bgcolor="#3A5766" align="center"|'''<font size="3">[[Tower Top|Sommet de la Tour]]</font>'''<br /> |
||
| + | <div style="font-size:12pt;">古代樹の森</div> |
||
| − | [[File:MH4-Tower_Top_Screenshot_001.jpg|150px|link=Tower Top]] |
||
| + | | style="background-color:#EBEBEB; text-align:center;" |'''[[Grand ravin]]''' |
||
| − | |align="center"| |
||
| + | |||
| − | |bgcolor="#3A5766" align="center"|'''<font size="3">[[Lava Island|Île de Lave]]</font>'''<br />[[File:MH4-Lava Island Screenshot 002.png|150px|link=Lava Island]] |
||
| + | <div style="font-size:12pt;">陸珊瑚の台地</div> |
||
| + | | style="background-color:#EBEBEB; text-align:center;" |'''[[Rivière éternelle]]''' |
||
| + | |||
| + | <div style="font-size:12pt;">瘴気の谷</div> |
||
|- |
|- |
||
| + | |width="150px"|[[File:MHW-Arena Screenshot 001.jpg|145px|link=Arène (MHW)]] |
||
| − | |align="center"| |
||
| + | |- |
||
| − | |align="center"| |
||
| + | | style="background-color:#EBEBEB; text-align:center;" |'''[[Arène (MHW)]]''' |
||
| − | |align="center"| |
||
| + | |||
| − | |align="center"| |
||
| + | <div style="font-size:12pt;">大蟻塚の荒地</div> |
||
| − | |align="center"| |
||
| + | |- |
||
| − | |align="center"| |
||
| + | |||
| + | |width="150px"|[[Fichier:MHW-Hoarfrost_Reach_Artwork_002.jpg|145px|link=Givre éternel]] |
||
| + | |width="150px"|[[Fichier:MHWI-Guiding-lands.jpg|145px|link=Fief glorieux]] |
||
| + | |width="150px"|[[Fichier:MHWI-Berceau oublié.jpg|145px|link=Berceau oublié]] |
||
| + | |- |
||
| + | | style="background-color:#EBEBEB; text-align:center;" |'''[[Givre éternel]]''' |
||
| + | |||
| + | <div style="font-size:12pt;">渡りの凍て地</div> |
||
| + | | style="background-color:#EBEBEB; text-align:center;" |'''[[Fief glorieux]]''' |
||
| + | |||
| + | <div style="font-size:12pt;">導きの地</div> |
||
| + | | style="background-color:#EBEBEB; text-align:center;" |'''[[Berceau oublié]]''' |
||
| + | |||
| + | <div style="font-size:12pt;">導きの地</div> |
||
| + | |} |
||
| + | |||
| + | == Génération Frontier == |
||
| + | * [[Monster Hunter Frontier G1]] |
||
| + | * [[Monster Hunter Frontier G2]] |
||
| + | * [[Monster Hunter Frontier G3]] |
||
| + | * [[Monster Hunter Frontier G Genuine]] |
||
| + | * [[Monster Hunter Frontier G5]] |
||
| + | * [[Monster Hunter Frontier G6]] |
||
| + | * [[Monster Hunter Frontier G7]] |
||
| + | * [[Monster Hunter Frontier G8]] |
||
| + | * [[Monster Hunter Frontier G9]] |
||
| + | * [[Monster Hunter Frontier G10]] |
||
| + | * [[Monster Hunter Frontier Z]] |
||
| + | |||
| + | {| align="center" border="0" width="100% style=" cellpadding="3" cellspacing="10" text-align:center; background-color:#996600; color:#000000; font-size:9pt;" |
||
| + | |- |
||
| + | |width="150px"|[[File:FrontierGen-Sky_Corridor_Background.jpg|145px|link=Corridor Céleste]] |
||
| + | |width="150px"|[[File:FrontierGen-Fortress_Ruins_Screenshot_001.jpg|145px|link=Ancienne forteresse]] |
||
| + | |||
| + | |- |
||
| + | | style="background-color:#EBEBEB; text-align:center;" |'''[[Corridor Céleste]]''' |
||
| + | |||
| + | <div style="font-size:12pt;">大蟻塚の荒地</div> |
||
| + | | style="background-color:#EBEBEB; text-align:center;" |'''[[Ancienne forteresse]]''' |
||
| + | |||
| + | <div style="font-size:12pt;">瘴気の谷</div> |
||
| + | |- |
||
| + | |||
| + | |width="150px"|[[File:DesertCanyonsArea1.png|145px|link=Canyon]] |
||
| + | |width="150px"|[[File:FrontierGen-Highlands Area1.jpg|145px|link=Région Montagneuse]] |
||
| + | |width="150px"|[[File:FrontierGen-Tide Island Screenshot 001.jpg|145px|link=Île Tropicale]] |
||
| + | |width="150px"|[[File:FrontierGen-Polar Sea Screenshot 001.jpg|145px|link=Mer Polaire]] |
||
| + | |- |
||
| + | | style="background-color:#EBEBEB; text-align:center;" |'''[[Canyon]]''' |
||
| + | |||
| + | <div style="font-size:12pt;">大蟻塚の荒地</div> |
||
| + | | style="background-color:#EBEBEB; text-align:center;" |'''[[Région Montagneuse]]''' |
||
| + | |||
| + | <div style="font-size:12pt;">瘴気の谷</div> |
||
| + | | style="background-color:#EBEBEB; text-align:center;" |'''[[Île Tropicale]]''' |
||
| + | |||
| + | <div style="font-size:12pt;">大蟻塚の荒地</div> |
||
| + | | style="background-color:#EBEBEB; text-align:center;" |'''[[Mer Polaire]]''' |
||
| + | |||
| + | <div style="font-size:12pt;">瘴気の谷</div> |
||
| + | |- |
||
| + | |||
| + | |width="150px"|[[File:MHFGG-Flower Field Screenshot 001.jpg|145px|link=Champ de Fleurs]] |
||
| + | |width="150px"|[[File:FrontierGen-White Lake Screenshot 002.jpg|145px|link=Désert Blanc]] |
||
| + | |width="150px"|[[File:FrontierGen-Painted Waterfalls Screenshot 001.jpg|145px|link=Cascades luxuriantes]] |
||
| + | |- |
||
| + | | style="background-color:#EBEBEB; text-align:center;" |'''[[Champ de Fleurs]]''' |
||
| + | |||
| + | <div style="font-size:12pt;">大蟻塚の荒地</div> |
||
| + | | style="background-color:#EBEBEB; text-align:center;" |'''[[Désert Blanc]]''' |
||
| + | |||
| + | <div style="font-size:12pt;">瘴気の谷</div> |
||
| + | | style="background-color:#EBEBEB; text-align:center;" |'''[[Cascades luxuriantes]]''' |
||
| + | |||
| + | <div style="font-size:12pt;">大蟻塚の荒地</div> |
||
| + | |- |
||
| + | |||
| + | |width="150px"|[[File:FrontierGen-Solitude Island Screenshot 001.jpg|145px|link=Île Isolée]] |
||
| + | |width="150px"|[[File:FrontierGen-NestHole Screenshot 001.jpg|145px|link=Tanière]] |
||
| + | |width="150px"|[[File:FrontierGen-Interceptor Screenshot 003.jpg|145px|link=Avant-Poste]] |
||
| + | |width="150px"|[[File:250px-SeaTrees.jpg|145px|link=Sommet de la Grande Forêt]] |
||
| + | |- |
||
| + | | style="background-color:#EBEBEB; text-align:center;" |'''[[Île Isolée]]''' |
||
| + | |||
| + | <div style="font-size:12pt;">大蟻塚の荒地</div> |
||
| + | | style="background-color:#EBEBEB; text-align:center;" |'''[[Tanière]]''' |
||
| + | |||
| + | <div style="font-size:12pt;">瘴気の谷</div> |
||
| + | | style="background-color:#EBEBEB; text-align:center;" |'''[[Avant-Poste]]''' |
||
| + | |||
| + | <div style="font-size:12pt;">大蟻塚の荒地</div> |
||
| + | | style="background-color:#EBEBEB; text-align:center;" |'''[[Sommet de la Grande Forêt]]''' |
||
| + | |||
| + | <div style="font-size:12pt;">瘴気の谷</div> |
||
| + | |- |
||
| + | |||
| + | |width="150px"|[[File:FrontierGen-Large Exploration Ship Screenshot 001.jpg|145px|link=Grand Navire d'Exploration]] |
||
| + | |width="150px"|[[File:Fin du Monde.jpg|145px|link=Fin du Monde]] |
||
| + | |width="150px"|[[File:MHF-GG-Deep Crater Screenshot 002.jpg|145px|link=Cratère Volcanique]] |
||
| + | |width="150px"|[[File:MHF-G5-Bamboo Forest Screenshot 001.jpg|145px|link=Forêt de Bambou]] |
||
| + | |- |
||
| + | | style="background-color:#EBEBEB; text-align:center;" |'''[[Grand Navire d'Exploration]]''' |
||
| + | |||
| + | <div style="font-size:12pt;">大蟻塚の荒地</div> |
||
| + | | style="background-color:#EBEBEB; text-align:center;" |'''[[Fin du Monde]]''' |
||
| + | |||
| + | <div style="font-size:12pt;">瘴気の谷</div> |
||
| + | | style="background-color:#EBEBEB; text-align:center;" |'''[[Cratère Volcanique]]''' |
||
| + | |||
| + | <div style="font-size:12pt;">大蟻塚の荒地</div> |
||
| + | | style="background-color:#EBEBEB; text-align:center;" |'''[[Forêt de Bambou]]''' |
||
| + | |||
| + | <div style="font-size:12pt;">瘴気の谷</div> |
||
| + | |- |
||
| + | |||
| + | |width="150px"|[[File:FrontierGen-Solitude Island Depths Screenshot 001.jpg|145px|link=Profondeur de l'Île Isolée]] |
||
| + | |width="150px"|[[File:FrontierGen-Cloud Viewing Fortress Screenshot 001.jpg|145px|link=Mirador Céleste]] |
||
| + | |- |
||
| + | | style="background-color:#EBEBEB; text-align:center;" |'''[[Profondeur de l'Île Isolée]]''' |
||
| + | |||
| + | <div style="font-size:12pt;">大蟻塚の荒地</div> |
||
| + | | style="background-color:#EBEBEB; text-align:center;" |'''[[Mirador Céleste]]''' |
||
| + | |||
| + | <div style="font-size:12pt;">瘴気の谷</div> |
||
| + | |- |
||
| + | |} |
||
| + | |||
| + | == Génération Online == |
||
| + | * [[Monster Hunter Online]] |
||
| + | |||
| + | {| align="center" border="0" width="100% style=" cellpadding="3" cellspacing="10" text-align:center; background-color:#996600; color:#000000; font-size:9pt;" |
||
| + | |- |
||
| + | |width="150px"|[[File:MHO-Dawnwind Valley Screenshot 002.jpg|145px|link=Bois Venteux]] |
||
| + | |width="150px"|[[File:MHO-Hermit Forest Screenshot 005.jpg|145px|link=Forêt de l'Ermite]] |
||
| + | |width="150px"|[[File:MHO-Thunderous Sands Screenshot 002.jpg|145px|link=Plateaux sablonneux]] |
||
| + | |width="150px"|[[File:MHO-Kumbel Wetlands Screenshot 004.jpg|145px|link=Marais de Kumbel]] |
||
| + | |||
| + | |- |
||
| + | | style="background-color:#EBEBEB; text-align:center;" |'''[[Bois Venteux]]''' |
||
| + | |||
| + | <div style="font-size:12pt;">大蟻塚の荒地</div> |
||
| + | | style="background-color:#EBEBEB; text-align:center;" |'''[[Forêt de l'Ermite]]''' |
||
| + | |||
| + | <div style="font-size:12pt;">瘴気の谷</div> |
||
| + | | style="background-color:#EBEBEB; text-align:center;" |'''[[Plateaux sablonneux]]''' |
||
| + | |||
| + | <div style="font-size:12pt;">大蟻塚の荒地</div> |
||
| + | | style="background-color:#EBEBEB; text-align:center;" |'''[[Marais de Kumbel]]''' |
||
| + | |||
| + | <div style="font-size:12pt;">瘴気の谷</div> |
||
| + | |- |
||
| + | |||
| + | |width="150px"|[[File:MHO-Ancestral Tomb Screenshot 001.jpg|145px|link=Tombeau Ancestral]] |
||
| + | |width="150px"|[[File:MHO-Esther Lake Screenshot 004.jpg|145px|link=Lac d'Esther]] |
||
| + | |width="150px"|[[File:MHO-Yilufa Snowy Mountains Screenshot 005.jpg|145px|link=Montagne Enneigée d'Yilufa]] |
||
| + | |width="150px"|[[File:MHO-Dark Veil Forest Screenshot 001.jpg|145px|link=Sombre Forêt Cachée]] |
||
| + | |- |
||
| + | | style="background-color:#EBEBEB; text-align:center;" |'''[[Tombeau Ancestral]]''' |
||
| + | |||
| + | <div style="font-size:12pt;">大蟻塚の荒地</div> |
||
| + | | style="background-color:#EBEBEB; text-align:center;" |'''[[Lac d'Esther]]''' |
||
| + | |||
| + | <div style="font-size:12pt;">瘴気の谷</div> |
||
| + | | style="background-color:#EBEBEB; text-align:center;" |'''[[Montagne Enneigée d'Yilufa]]''' |
||
| + | |||
| + | <div style="font-size:12pt;">大蟻塚の荒地</div> |
||
| + | | style="background-color:#EBEBEB; text-align:center;" |'''[[Sombre Forêt Cachée]]''' |
||
| + | |||
| + | <div style="font-size:12pt;">瘴気の谷</div> |
||
| + | |- |
||
| + | |width="150px"|[[File:MHO-Clamorous Ridge Screenshot 003.jpg|145px|link=Crête Enneigée]] |
||
| + | |width="150px"|[[File:MHO-Moonlands Screenshot 001.jpg|145px|link=Désert Lunaire]] |
||
| + | |width="150px"|[[File:MHO-Great Fortress Lake Screenshot 001.jpg|145px|link=Grand Lac de la Forteresse]] |
||
| + | |- |
||
| + | | style="background-color:#EBEBEB; text-align:center;" |'''[[Crête Enneigée]]''' |
||
| + | |||
| + | <div style="font-size:12pt;">大蟻塚の荒地</div> |
||
| + | | style="background-color:#EBEBEB; text-align:center;" |'''[[Désert Lunaire]]''' |
||
| + | |||
| + | <div style="font-size:12pt;">瘴気の谷</div> |
||
| + | | style="background-color:#EBEBEB; text-align:center;" |'''[[Grand Lac de la Forteresse]]''' |
||
| + | |||
| + | <div style="font-size:12pt;">大蟻塚の荒地</div> |
||
|- |
|- |
||
| − | |bgcolor="#3A5766" align="center"|'''<font size="3">[[Arena (MH4)|Arène (MH4)]]</font>'''<br />[[File:MH4-Arena_Screenshot_001.jpg|150px|link=Arena (MH4)]] |
||
| − | |align="center"| |
||
| − | |bgcolor="#3A5766" align="center"|'''<font size="3">[[3D Arena|Arène 3D]]</font>'''<br />[[File:MH4-3D_Arena_Screenshot_001.jpg|150px|link=3D Arena]] |
||
|} |
|} |
||
[[Catégorie:Zones]] |
[[Catégorie:Zones]] |
||
| − | [[Catégorie:Tout]] |
||
Version du 23 février 2020 à 00:33
| Certains noms utilisés dans cet article proviennent d'une traduction non officielle du nom japonais des monstres. Les noms sont obtenus par traduction, ou à l'aide de termes équivalents en anglais et français dans les précédents opus déjà traduits. |
Voici les différentes zones ou régions du monde de Monster Hunter.
La liste des lieux recense les lieux qui constituent le monde en question, les villes et villages étant des zones d'habitations sûres dispersées un peu partout et reliées par des routes, qu'elles soit terrestres, maritimes ou aériennes, qui font office de lieu de rencontre pour les chasseurs mais aussi de point de départ de leurs expéditions. Les autres lieux sont des terrains de chasses et habitats des monstres, entièrement naturels, hormis ceux qui furent habités et laissés à l'abandon, comme le Château Schrade ou encore les Tours. Chaque région est composée de plusieurs zones et camps qui sont disposés un peu partout dans certaines de ces zones, sûrs et à l'abri des monstres. Dans chaque opus, les régions sont assez éloignées les unes des autres, à part celles du cinquième opus, car elles sont toutes sur une seule et même île.
Villes et villages


|

|

|

|
| Place Mezeporta | Village Milard | Manoir du Chasseur | Mezeporta |
1ère génération

|

|

|

|
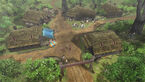
| Forêt et Collines
|
Vieille Jungle
|
Vieux Désert
|
Vieux Marais
|

|

|

|

|
| Vieux Volcan
|
Forteresse
|
Château Schrade
|
Terrain de Bataille
|

|

|
||
| Arène
|
Grande Arène
|
2ème génération

|

|

|

|
| Montagne enneigée
|
Jungle
|
Désert
|
Marais
|

|

|

|

|
| Volcan
|
Grande Forêt
|
Ville
|
Pics Enneigés
|

|

|

|

|
| Tour
|
Tour 2
|
Tour 3
|
Arène des douves
|
3ème Génération


4ème Génération
- Monster Hunter 4
- Monster Hunter 4 Ultimate
- Monster Hunter Generations
- Monster Hunter Generations Ultimate
Notes: Dans Monster Hunter Generations, les zones Forêt et Collines, Montagne enneigée et Montagne sacrée sont renommées en Collines verdoyantes, Crête arctique et Cime des esprits.

|

|

|

|
| Steppe ancestrale
遺跡平原
|
Forêt primitive
原生林
|
Vallon immergé
地底洞窟
|
Mer de glace
氷海
|

|

|

|

|
| Vallon volcanique
地底火山
|
Mont céleste
天空山
|
Pinacle
塔の頂
|
Bois éternel
未知の樹海
|

|

|

|

|
| Sanctuaire
禁足地
|
Île d'Ingle
溶岩島
|
Pointe de lance
千剣山
|
Dunes
旧砂漠
|

|

|

|

|
| Arène
闘技場
|
Colisée
立体闘技場
|
Zone polaire
極圏
|
Grand Océan
極圏
|

|

|

|

|
| Cimetière des wyvernes
龍ノ墓場
|
Frontière jurassique
古代森
|
Cime oubliée
遺群嶺
|
Bastion perdu
旧砦跡
|
5ème génération

|

|

|

|
| Désert des termites
大蟻塚の荒地
|
Forêt ancienne
古代樹の森
|
Plateau de corail
陸珊瑚の台地
|
Val putride
瘴気の谷
|

|

|

|

|
| Terre des anciens
大蟻塚の荒地
|
Croisée des destins
古代樹の森
|
Grand ravin
陸珊瑚の台地
|
Rivière éternelle
瘴気の谷
|

| |||
| Arène (MHW)
大蟻塚の荒地
| |||

|

|

| |
| Givre éternel
渡りの凍て地
|
Fief glorieux
導きの地
|
Berceau oublié
導きの地
|
Génération Frontier
- Monster Hunter Frontier G1
- Monster Hunter Frontier G2
- Monster Hunter Frontier G3
- Monster Hunter Frontier G Genuine
- Monster Hunter Frontier G5
- Monster Hunter Frontier G6
- Monster Hunter Frontier G7
- Monster Hunter Frontier G8
- Monster Hunter Frontier G9
- Monster Hunter Frontier G10
- Monster Hunter Frontier Z

|

| ||
| Corridor Céleste
大蟻塚の荒地
|
Ancienne forteresse
瘴気の谷
| ||

|

|

|

|
| Canyon
大蟻塚の荒地
|
Région Montagneuse
瘴気の谷
|
Île Tropicale
大蟻塚の荒地
|
Mer Polaire
瘴気の谷
|

|

|

| |
| Champ de Fleurs
大蟻塚の荒地
|
Désert Blanc
瘴気の谷
|
Cascades luxuriantes
大蟻塚の荒地
| |

|

|

|

|
| Île Isolée
大蟻塚の荒地
|
Tanière
瘴気の谷
|
Avant-Poste
大蟻塚の荒地
|
Sommet de la Grande Forêt
瘴気の谷
|

|

|

|

|
| Grand Navire d'Exploration
大蟻塚の荒地
|
Fin du Monde
瘴気の谷
|
Cratère Volcanique
大蟻塚の荒地
|
Forêt de Bambou
瘴気の谷
|

|

| ||
| Profondeur de l'Île Isolée
大蟻塚の荒地
|
Mirador Céleste
瘴気の谷
|
Génération Online

|

|

|

|
| Bois Venteux
大蟻塚の荒地
|
Forêt de l'Ermite
瘴気の谷
|
Plateaux sablonneux
大蟻塚の荒地
|
Marais de Kumbel
瘴気の谷
|

|

|

|

|
| Tombeau Ancestral
大蟻塚の荒地
|
Lac d'Esther
瘴気の谷
|
Montagne Enneigée d'Yilufa
大蟻塚の荒地
|
Sombre Forêt Cachée
瘴気の谷
|

|

|

| |
| Crête Enneigée
大蟻塚の荒地
|
Désert Lunaire
瘴気の谷
|
Grand Lac de la Forteresse
大蟻塚の荒地
|